


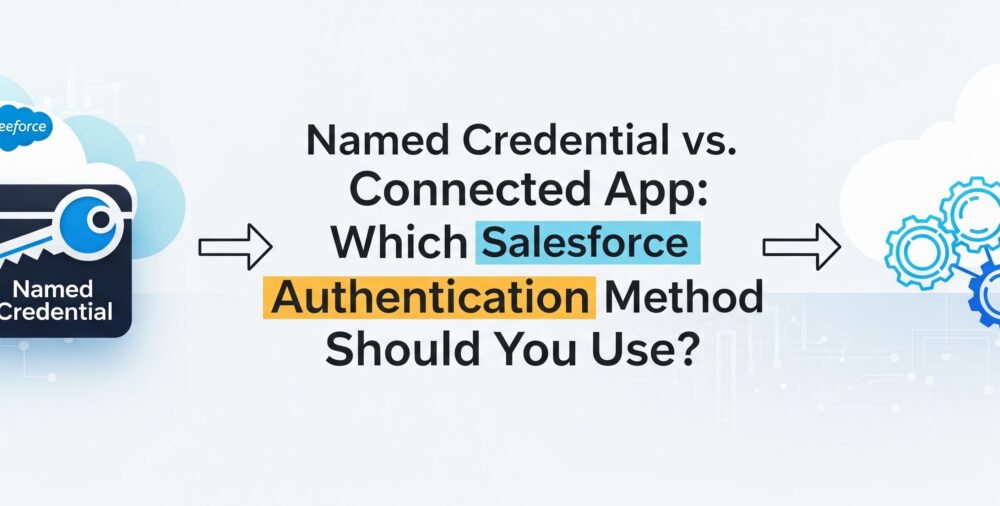
Table of Contents
In the world of Salesforce integration, two terms frequently surface, often causing confusion for developers and architects alike: Connected Apps and Named Credentials. Both are fundamental to connecting Salesforce with external systems, yet they serve distinctly different purposes. Understanding this difference isn’t just academic; it’s crucial for building secure, scalable, and maintainable integrations.
Choosing the wrong tool can lead to security vulnerabilities, brittle code, and frustrating maintenance cycles. On the other hand, leveraging the right one streamlines development, enhances security, and simplifies administration. So, how do you decide between them?
This guide will demystify the roles of Connected Apps and Named Credentials. We’ll break down their core functions, compare them head-to-head, explore practical scenarios for each, and even reveal how they can be integrated to work together. By the end, you’ll be able to confidently choose the right authentication method for any Salesforce integration challenge.
Understanding the Core Concepts: What Are They?
Before we dive into a direct comparison, let’s establish a clear understanding of what each component is and what it’s designed to do. Think of them as two different types of security badges for accessing a building. One identifies you as a visitor allowed to enter (Connected App), while the other is a keycard your employees use to access other buildings (Named Credential).
What is a Connected App?
A Connected App is a framework that enables an external application to connect to Salesforce over APIs. Its primary job is to identify the external application to Salesforce, control its access policies, and facilitate authentication using industry-standard protocols, such as OAuth 2.0.
Imagine you are building a custom mobile app that needs to pull customer data from your Salesforce org. The Connected App is the gatekeeper. You create a Connected App in Salesforce, which generates a set of identifiers (a Consumer Key and Consumer Secret). Your mobile app then uses these identifiers to initiate an authentication flow with Salesforce. This flow confirms that the app is legitimate and requests permission for it to access the user’s data.
In short, a Connected App is all about **inbound integration**: an external system needing access to Salesforce.
Key characteristics of a Connected App:
- It serves as an entry point for external applications to access Salesforce.
- It utilizes protocols such as OAuth 2.0 and SAML for authentication and authorization.
- It enforces security policies, such as IP restrictions, session timeouts, and required user permissions (scopes).
- It doesn’t store credentials but provides the mechanism for an external client to obtain an access token.
What is a Named Credential?
A Named Credential specifies the URL of a callout endpoint and its required authentication parameters in a single, concise definition. Its primary job is to make it easy and secure for Salesforce to make a callout to an external system. It handles all the authentication heavy lifting on the backend, so your code remains clean, simple, and free of sensitive information.
Imagine your Apex code needs to call an external shipping provider’s API to get a delivery quote. Without a Named Credential, you would have to manually construct the HTTP request, add the endpoint URL, and hardcode the API key or password directly in your code or a custom setting. This is a major security risk.
With a Named Credential, you securely store the endpoint URL and authentication details (such as an API key, username/password, or OAuth token) within the Salesforce platform. Your Apex code then simply references the Named Credential by its name. Salesforce automatically handles the authentication when the call is made.
In short, a Named Credential is for outbound integration: Salesforce needs access to an external system.
Key characteristics of a Named Credential:
- It bundles the endpoint URL and authentication details into a single reference.
- It eliminates the need to store credentials or API keys in code, custom metadata, or custom settings.
- It simplifies Apex callout code, making it more readable and maintainable.
- It supports various authentication protocols, including Basic Auth, OAuth 2.0, JWT, and more.
Named Credential vs. Connected App: Key Differences
Now that we have a foundational understanding, let’s put them side by side to highlight their crucial differences.
Primary Use Case & Direction of Communication
This is the most important distinction.
Connected App: Manages inbound communication. An external application is the client, and Salesforce is the server. Its purpose is to authenticate and authorize the external app so it can access Salesforce APIs.
Named Credential: Manages outbound communication. Salesforce is the client, and an external system is the server. Its purpose is to authenticate Salesforce so it can access the external system’s APIs.
Authentication & Authorization
While both deal with authentication, they play different roles.
Connected App: It’s a framework for an external client to authenticate against Salesforce. It facilitates the OAuth dance, where the user is often prompted with a consent screen to authorize the app to access their data on their behalf.
Named Credential: It authenticates Salesforce itself when it makes a call to an external service. It handles the authentication protocol transparently, whether it’s sending a password, an API key in a header, or managing a complex OAuth flow with the remote system.
Security & Credential Storage
How they handle sensitive information is a critical security differentiator.
Connected App: It does not store credentials. It provides the Consumer Key and Secret, which are identifiers for the app, not user credentials. These are used to start the authentication process, which ultimately results in a temporary access token for the external client.
Named Credential: Its core security benefit is that it securely stores authentication details on the Salesforce platform. This includes passwords, security tokens, API keys, and certificates. By abstracting credentials away from your code, you prevent them from being exposed in version control or to developers without the proper permissions.
Code & Implementation
The impact on your codebase is vastly different.
Connected App: It is primarily a configuration exercise within the Salesforce setup. The actual implementation work is done by the developer of the external application, who must write code to handle the OAuth flow using the keys provided by the Connected App.
Named Credential: It dramatically simplifies your server-side Apex code. Instead of writing boilerplate code to handle authentication headers and manage endpoints, you can make a clean, secure callout with just one line of code referencing the Named Credential. For example: `HttpRequest.setEndpoint(‘callout: My_API_Credential/path’)`.
When to Use Which: Practical Scenarios
Let’s move from theory to practice. Here are common scenarios that clarify when to choose one over the other.
Use a Connected App When..
- You are building a mobile application that needs to view, create, or update records in Salesforce. The mobile app will use the Connected App’s details to log the user into Salesforce via OAuth.
- You are developing a third-party web application (e.g., a custom portal on Heroku or AWS) that requires integration with Salesforce data.
- You are integrating a commercial SaaS platform, such as MuleSoft, an ERP, or a marketing automation tool, that requires API access to your Salesforce org. You would create a Connected App to represent that platform within Salesforce and control its permissions.
- You need to set up single sign-on (SSO), where users log into another service using their Salesforce credentials.
Use a Named Credential When…
- Your Apex trigger must call an external API to retrieve data before saving a record. For instance, calling a credit check service when a new Opportunity is created.
- You want to display data from an external database on a Visualforce page or in a Lightning Web Component by calling a REST API.
- You are using declarative tools, such as Flow HTTP Callouts or External Services, to connect to an external API without writing any code. These tools are built to work seamlessly with Named Credentials.
- You need to send data to an external system. For example, posting an update to a Slack channel or creating a record in an external project management tool whenever a Case is closed in Salesforce.
The Synergistic Relationship: Can They Be Used Together?
While they are distinctly different, there are advanced scenarios where the concepts behind Connected Apps and Named Credentials work together, particularly when Salesforce needs to call an external service that is also secured by OAuth 2.0.
In this case, you would create a Named Credential and set its authentication protocol to OAuth 2.0. As part of this configuration, you would also need to set up an “Authentication Provider” in Salesforce. This provider stores the details of the external OAuth-enabled service, much like a Connected App stores the details of an external app. The Named Credential then uses this Auth. Provider to handle the complex token exchange with the external service automatically.
So, while you aren’t using a “Connected App” and a “Named Credential” in the same transaction, the principles of OAuth management (central to Connected Apps) are used by Named Credentials to enable outbound callouts to secure endpoints.
A Summary Table
For quick reference, a table summarizing the key differences is provided below.
| Feature | Connected App | Named Credential |
| Direction | Inbound (External System → Salesforce) | Outbound (Salesforce → External System) |
| Purpose | Authenticate and authorize external clients | Authenticate Salesforce, making a callout |
| Stores Credentials? | No — it facilitates a token exchange. | Yes — securely stores credentials and tokens. |
| Simplifies Code? | No — it is used by the client’s code. | Yes — it dramatically simplifies Apex callouts. |
| Primary Protocol | OAuth 2.0, SAML, OpenID Connect | Various (Basic Auth, OAuth, JWT, etc.) |
| Analogy | A bouncer is checking IDs at the club’s door. | A pre-approved corporate passport for travel. |
How to Create a Salesforce Connected
Prerequisites and Key Terminology
1. Salesforce Org with Admin Privileges: You need to be able to access the Setup menu and have permissions to create and manage applications. A free Salesforce Developer Edition org is the perfect environment for learning and testing.
2. A Clear Integration Goal: You should have a solid understanding of what your external application needs to do. What data does it need to access? Will it only read data, or does it also need to write data? 3. Basic Understanding of OAuth 2.0 (Recommended): While not strictly required to follow this guide, having a foundational knowledge of how OAuth 2.0 authorization flows work will provide valuable context for the configuration steps.
Key Concepts
When you create a Connected App, you’ll encounter several key terms related to the OAuth 2.0 protocol. Understanding these is crucial for proper configuration.
- Consumer Key (Client ID): This is a unique identifier for your Connected App. It’s publicly visible and is used to tell Salesforce which application is requesting access.
- Consumer Secret (Client Secret): This is essentially the password for your Connected App. It must be kept confidential and stored securely within your external application. It’s used to verify the identity of the application when it requests an access token.
- Callback URL (Redirect URI): This is a critical security component. After a user successfully authenticates and authorizes the application, Salesforce redirects them back to this specific URL. The Callback URL must be a secure endpoint that you control, as it’s where Salesforce will send the authorization code.
- OAuth Scopes: These define the permissions that your Connected App requests. Scopes determine what kind of data the app can access and what actions it can perform. For example, the `api` scope allows the app to access and manage your data, while the `refresh_token` scope allows it to obtain a new access token without requiring the user to log in again.
The Step-by-Step Guide to Creating Your Salesforce Connected App
Step 1: Navigate to the App Manager
First, log in to your Salesforce org. In the top-right corner, click the gear icon and select Setup. In the Quick Find box on the left, type “App Manager” and click on it. This will take you to a list of all applications in your org. In the top-right corner of this page, click the New Connected App button.
Step 2: Fill in the Basic Information
You will now see the main configuration page for your new app. The first section is for basic information.
- Connected App Name: This is the user-facing name of your application. Make it descriptive, for example, “Custom Analytics Dashboard” or “Mobile Timesheet App.”
- API Name: Salesforce automatically generates this based on the app name. This is the name developers will use when referencing the app in code. You can leave it as the default.
- Contact Email: Enter your email address. Salesforce will use this information to contact you if any issues arise with your Connected App.
Step 3: Enable and Configure OAuth Settings
This is the most important section, where you define how your application will authenticate. Scroll down to the API (Enable OAuth Settings) section and check the box for Enable OAuth Settings. This will reveal several new configuration options.
- Callback URL: This field is mandatory. For development and testing, you can often use a placeholder like `https://login.salesforce.com/services/oauth2/callback`. For a real-world application, you would enter the specific URL endpoint in your external application that is designed to handle the OAuth redirect. You can enter multiple Callback URLs, each on a new line.
- Selected OAuth Scopes: This is where you grant permissions to your app. Select the required scopes from the Available OAuth Scopes list and click the “Add” arrow to move them to the Selected list. Here are a few essential scopes:
- Access and manage your data (api): This is the most common scope. It allows the app to access all data that the logged-in user can access.
- Perform requests on your behalf at any time (refresh_token, offline_access): This is crucial for long-term integrations. It allows your application to get a new access token when the current one expires, without forcing the user to re-authenticate.
- Provide access to your unique identifier (openid): Use this if you need to verify the user’s identity using the OpenID Connect protocol.
Step 4: Save and Retrieve Your Credentials
Once you have configured the OAuth settings, scroll to the bottom of the page and click Save. You will see a warning that it can take up to 10 minutes for the changes to take effect across the Salesforce infrastructure. Click Continue.
You will now be on the main page for your new Connected App. This page displays the Consumer Key (your app’s Client ID) and the Consumer Secret (your app’s Client Secret). Click the Click to reveal link next to the Consumer Secret to view it. These two values are the credentials your external application will use to connect to Salesforce. Copy them and store them securely. Never expose the Consumer Secret in client-side code or public repositories.
Conclusion: Making the Right Choice
The “Named Credential vs. Connected App” debate is not about which one is better, but rather which one is more suitable for the job at hand. The choice boils down to a single, simple question: What is the direction of the integration?
If an external application needs to integrate with Salesforce, you will need a Connected App. It’s your secure gateway for inbound API traffic.
If Salesforce needs to call out to an external API, you need a Named Credential. It’s your secure and simplified method for outbound communication.
By understanding this fundamental difference, you can design more robust, secure, and efficient integrations. The next time you begin an integration project, start by mapping the data flow. Once you know the direction, you’ll know exactly which tool to reach for, setting your project up for success from the very beginning. learn more about how AI can help you create efficiency and increase productivity.
Leave A Reply